Discovering everyday "joie de vivre" through food, style, and inspiration

Welcome! Join as we discover both spectacular and simple joys alike, remembering that life is a journey and it's up to each of us to make it special. Along the way, I'll share some of my original gluten-free recipes, book recommendations, DIY projects, style and decor tips, and plenty of inspiration. Thanks for visiting!

~ Kayla McGuire


Showing posts with label Lactose-Free. Show all posts

Monday, January 7, 2013

Slow Cooked Beef Brisket with Homemade BBQ Sauce


Along with whole chicken, beef brisket is another one of those meats that I had no desire to mess around with prior to about a year ago.  When it comes to red meat I tend to stick with the ground variety, largely because I just don’t like the texture of other steak-like cuts.  It wasn’t until I had regularly frequented the farmer’s market for about a year that I finally decided to try something a bit unfamiliar.  Dave suggested the brisket, and I, having no clue what to do with that two and a half pound cut, was understandably a little wary.  I forget how we cooked the brisket that first time, but what I do remember is that it was nothing like what I thought it would be.  Slow-cooking is really the best way to go and I find when properly cooked and served with a flavorful sauce, brisket can be moist and quite delicious.  While brisket isn’t a staple in my weekly menu, I do enjoy serving it from time to time, especially when I see a nice one at the farmer’s market.  Enjoy my recipe below!

For the barbeque sauce:

  • 2 cups ketchup (use a corn syrup-free brand)
  • 1 cup water, room temperature
  • ½ cup apple cider vinegar
  • ½ cup honey
  • 1 tablespoon lemon juice
  • 1 tablespoon Worcestershire sauce
  • 2 teaspoons black pepper
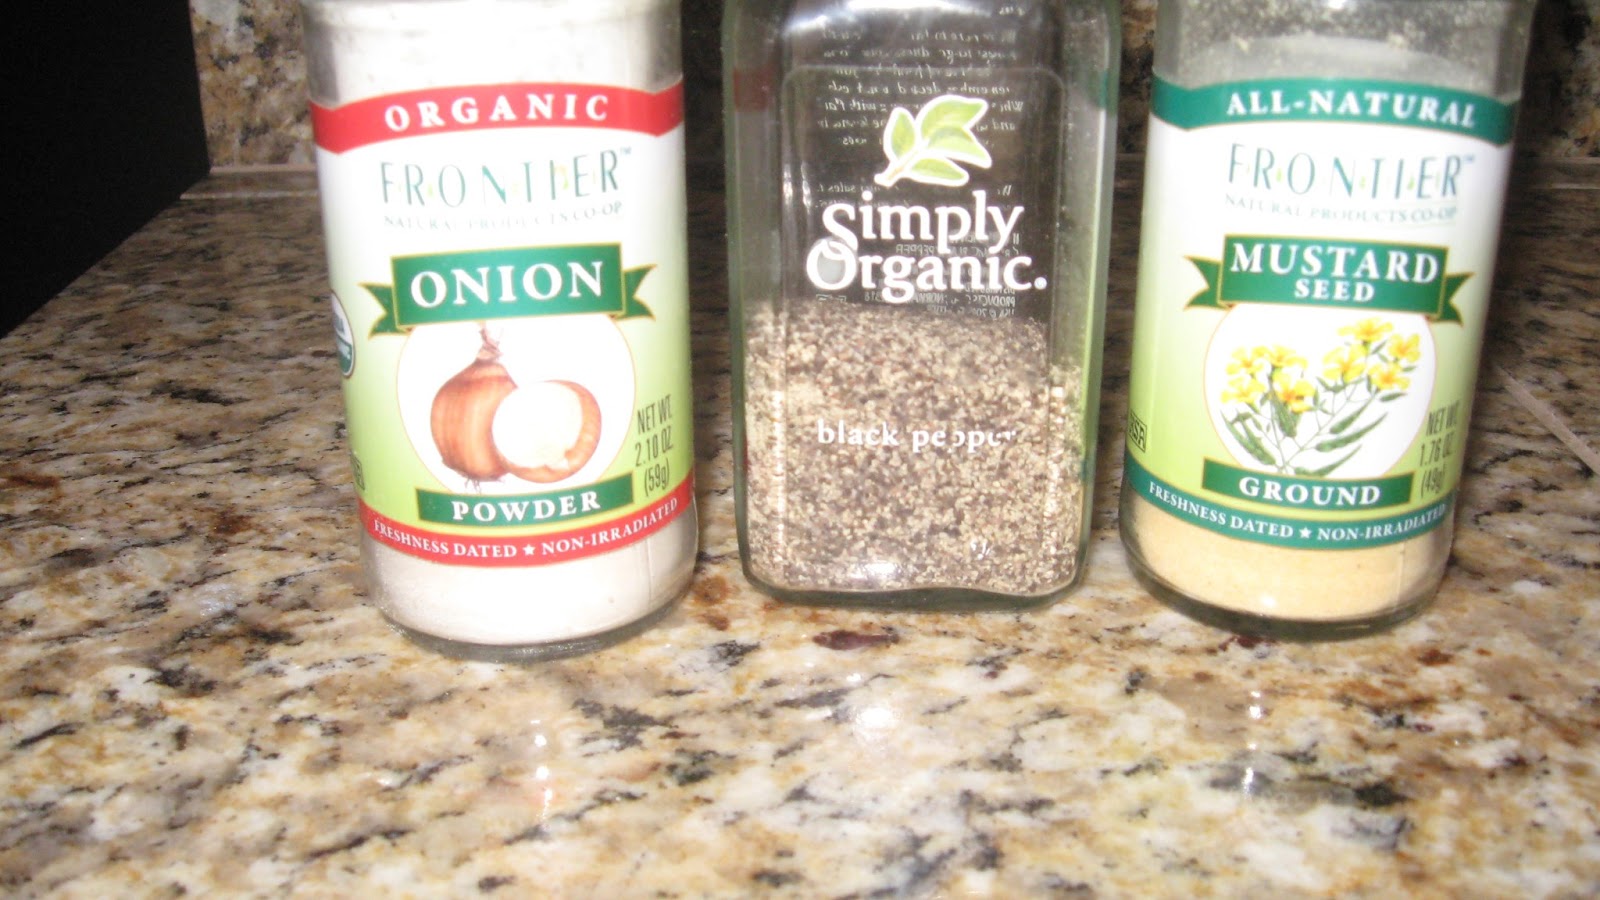
  • 2 teaspoons onion powder
  • 2 teaspoons ground mustard


Combine ingredients in a medium saucepan.    


Place over medium-low heat and simmer for 30-45 minutes.  Remove from heat and let cool.


For the brisket:

  • 2-2.5 pound beef brisket
  • Salt
  • Pepper
  • 2 cups barbeque sauce (recipe above)


Lightly salt and pepper the brisket.  Place in a slow cooker.  

Smother brisket with barbeque sauce.  Turn slow cooker to low and cook for 2 hours, turning brisket after 1 hour.  


Remove from slow cooker and slice into ½ inch strips.  Serve with remaining barbeque sauce.

Tuesday, December 18, 2012

Easy Appetizer Menu for Your Next Party!


Are you hosting a party but perplexed about what to serve?  Perhaps you haven’t had the time to think about your party menu and now it’s crunch time.  Whatever the case, we’ve all been there, with our best of intentions to throw an amazing party, only to be beaten by the clock.  It’s these occasions when I employ my “easy appetizer” menu.  Classier than serving chips and salsa but yet much easier to prepare than a gourmet spread, sometimes easy appetizers are undoubtedly the way to go. When planning a party, remember to inquire as to whether any of your guests have food restrictions and plan accordingly.  If you are serving appetizers a la my suggestions below, you will find that most special diets are easily accommodated.  Here are my recommendations, perfect for any occasion, any time of year:

Crackers – Nut Thins are gluten-free and come in a variety of flavors.  My personal favorite flavors are Smokehouse and Sea Salt.

Cheese – Offer several varieties, such as a simple mild cheddar or Monterey Jack, a soft cheese like Brie, and a harder cheese or one with a bit more depth.    

Sliced deli meats – Prosciutto is always a hit.  Thinly sliced salami is another great option. 

Jam – Recently, I came across this fig spread at Whole Foods and had to try it.  I served it with prosciutto, crackers, and Brie, and found it to be absolutely delightful.  This is definitely a new staple on my appetizer menu.

Veggies – The easiest to serve are baby carrots, but it’s nice to offer something green as well.  Cucumbers are perfect when sliced in rounds and can be used as a healthy substitute for crackers. 

Dip – This could be a favorite from the deli or a special recipe made in advance.  If you have a few minutes, I do highly recommend making your own.  One of my favorite dip recipes is SarahFragoso’s Roasted Red Pepper Dip (click on the link then scroll down for the recipe).  I’ve also included my easy honey mustard dip recipe at the bottom of this post. 

Olives – Pitted green olives are usually a safe bet. 

Fruit – Choose something easy to prepare and simple for guests to grab and eat.  Grapes are a wonderful choice year round; berries are always appreciated in the warmer months.

Nuts – Pecans and walnuts seem to be the most popular at parties.  If you have time, try spicing things up by serving my Maple Cinnamon Pecans.  Simply make them a day in advance, keep in a Ziploc bag, and serve in a cute bowl!


Honey Mustard Dip
·         ¼ cup mayonnaise
·         1 ½ tablespoons mustard
·         2 tablespoons honey
·         ½ teaspoon garlic powder
·         ¼ teaspoon cayenne
·         ½ tablespoon olive oil
·         ½ teaspoon lemon juice
·         Pepper, to taste

Mix all ingredients together in a small bowl.  Serve with sliced veggies.

Monday, December 3, 2012

Maple Cinnamon Pecans

Ah, the holidays, what joy they bring!   I know everyone doesn’t feel the same way and I do agree that sometimes the commercialism of it all can turn anyone into a Scrooge; however, many of the Christmas traditions I grew up with will always hold a special place in my heart.  Of course, one of those traditions is the preparation of traditional holiday foods, particularly sweets. After adjusting my diet to eliminate most processed foods and refined flour and sugar, I’ve found I have a different appreciation for sweets.  No longer do I crave the taste of corn syrup and white sugar, but instead I’ve developed a taste for rich and creamy textures, the delicate flavor of honey, and fine quality chocolate.  This delightful balance of flavors is what prompted me to create the Cashew Butter Cup recipe that I posted last week.  Today I’d like to share another favorite with you all.  This particular recipe is one I make often around the holiday season, and also frequently at other times during the year.  Instead of focusing on a rich and creamy texture, with this recipe I wanted to bring in the candied crunch that many of us enjoy, whether as a snack, on a salad, or atop a bowl of ice cream.  This week I’m happy to share my simple yet satisfying recipe for Maple Cinnamon Pecans.  Enjoy without the added guilt of corn syrup and sugar!
Maple Cinnamon Pecans 
·         2 cups raw pecans
·         ¼ cup maple syrup
·         1/2 teaspoon cinnamon
·         1 pinch sea salt


1.      Soak and dehydrate pecans.  I always try to purchase raw nuts, then soak and dehydrate them to ensure proper nutrient absorption.  (Of course, this week they were all out of raw pecans at the grocery store!  But, for the sake of this recipe, let’s pretend they are raw.) Soak in a bowl of water with one teaspoon of salt for 6-8 hours.  Then, dry in oven at lowest heat (or dehydrate) until dry.  Nuts naturally contain enzyme inhibitors that will hamper digestion and sometimes even prevent the body from absorbing nutrients.  Read here to learn more about proper preparation of nuts.

  2.      Spread pecans on a baking sheet and roast at 300 for 15-20 minutes, or until crunchy.

3.      While pecans are roasting, combine syrup, cinnamon, and salt in a medium saucepan and cook on low for 5 minutes, or until very runny.  Remove from heat.


4.      Mix roasted pecans with syrup and stir until pecans are coated. 


 5. Spread pecans evenly on parchment paper to cool. Serve when coating has hardened, after about 2 hours. Enjoy!


Sunday, November 18, 2012

Cashew Butter Cups - Recipe!


I had been searching (unsuccessfully, I might add) for quite some time for a Peanut Butter Cup recipe…except without sugar…and no peanut butter…and also gluten-free J.  Can you understand my dilemma?!  Finally, last week I took it upon myself to craft my own recipe, and not to toot my own horn, but it turned out pretty darn good!  Using a nut butter recipe I make often (modified from the Nourishing Traditions cookbook), I was able to create this delicious, creamy chocolate dessert.  Enjoy my Cashew Butter Cup recipe alone or topped with ice cream and a piece of fruit for some extra pizzazz.


Cashew Butter Cups
Makes 18 servings

Chocolate Base
¾ cup cacao butter, melted
1/3 cup cacao powder
¼ cup, plus 1 tablespoon honey
¼ teaspoon vanilla
2 pinches sea salt

Combine all ingredients until smooth.

Cashew Butter
2 cups raw cashews, soaked and dehydrated
1 big pinch sea salt
3 tablespoons honey
½ cup coconut oil

Combine cashews and sea salt in the food processor and process on low until a fine powder forms.  Add honey and coconut oil to cashews and process until creamy.

To assemble Cashew Butter Cups:

Using a regular sized muffin tin, fill each space about ¼ full with the chocolate base.  Place tin in freezer for 20 minutes or until chocolate is solid.  Remove from freezer and top with an equal amount of cashew butter (each space should be about ½ full at this point).  Place in freezer for 15 minutes.  Remove from freezer and let sit for 5 minutes; this will help loosen the chocolate.  Serve alone or topped with ice cream and berries.  Bon appétit!

Wednesday, May 23, 2012

Two Healthy Picnic Recipes

Hi Folks!  Dave and I took two week-long trips in the past month, all while frantically trying to keep up at work and maintain our sanity.  We got back into Denver on Saturday evening, and somehow mustered the energy to plant our balcony container garden on Sunday.  (Denverites: if you have not been to Paulino Gardens -north on I-25, exit 58th ave - you MUST go!  It’s a fantastic nursery and even if you don’t buy anything it’s fun to look around at all the plants.  We try to make a trip up there every few months or so and always end up buying something.  I swear, with all of the plants in our little 950 square foot home, we must have a mini-ecosystem or something!)  I’m really excited and optimistic about our garden this year.  Last year was our first year experimenting with container gardening, and it was certainly a learning experience.  We’ve decided to scale it down for 2012 but still have plenty of flowers and herbs, as well as a cherry tomato plant, two small variety pepper plants, and a Lisbon lemon tree.  Cross your fingers for us!
As we all know, Memorial Day weekend traditionally rings in the summer, usually with lots of outdoor parties and FOOD.  In the past I have had a hard time at barbeques because there is often a lack of vegetable dishes and an abundance of junk food.   Luckily, I now have a few tried and true alternatives to the junk.  In the spirit of the upcoming holiday, I’m going to share a couple of my favorites with you.  I hope these recipes give you some fresh ideas!  Enjoy the weekend!
Refreshing Herbal Tea
For those of you who are looking for a lightly sweetened, non-alcoholic, caffeine free, and sugar free beverage, I highly suggest Stash Herbal Tea’s Wild Raspberry Hibiscus Tea.  Add a little stevia powder while the tea is brewing and serve over ice with a fresh lemon wedge.  Hibiscus can also help lower blood pressure! 

Asian Slaw
Recently, I actually took the time to read a few articles in my Vitamin Cottage grocery store flyer and came across this delicious slaw recipe!  I’d been trying to find a tasty non-mayonnaise based slaw for a while and this one is definitely a winner.  Keeps well, especially at picnics or barbeques where food sits out in the heat.
6 cups thinly sliced napa cabbage (red, green, or a combination can be substituted)
2 large carrots, grated
6 green onions, thinly sliced
½ cup chopped cashews

Dressing
1 tablespoon sesame oil
2 tablespoons olive oil
2 tablespoons rice vinegar (or apple cider vinegar)
1 tablespoon soy or tamari sauce
1 clove garlic, minced
1-2 tablespoons honey
Red pepper flakes to taste

Combine the prepared vegetables in a large serving bowl. In a separate bowl whisk the dressing ingredients thoroughly. Pour dressing over the vegetables and toss to combine. Top with chopped cashews and serve.

Quinoa Salad
The idea for this recipe comes from our trip to northern CA last year.  My brother-in-law introduced Dave and I to quinoa through a delicious salad.  I’ve since adopted a variation of the salad as a staple in my meal rotation.

8 cups fresh spinach
2 cups quinoa, rinsed and cooked
4 links chicken sausage, cooked and sliced (I recommend a chicken/feta/spinach blend sausage)
6 hard boiled eggs, sliced
3 carrots, peeled and grated
1 beet, grated*
1 pint cherry tomatoes
½ cup dried cranberries
½ cup feta cheese crumbles
½ cup walnuts, roughly chopped
Pepper, to taste
Fresh lemon juice, to taste

Assemble the salad and season with pepper and lemon juice.  Serve with a lemon/tahini dressing or balsamic vinaigrette.

*Sometimes grated beets can turn the quinoa a shade of pink.  Omit for a nicer presentation, or keep if you like pink quinoa J

Friday, April 13, 2012

Vacation Snack Ideas

Spring has sprung, the weather is beautiful, and before we know it the dog days of summer will be upon us! Ok, so maybe I won’t be lying around all summer long like my little dachshund, but I certainly plan on having some fun and relaxing during the warmer months. Dave and I both love travelling, which has turned out to be a great thing since we have immediate family members in six different states. Needless to say, we will be taking several trips this summer to relax, take in some new experiences, and enjoy time with family.

While vacations are something I generally look forward to with excitement, I usually have some concern when thinking about what I will eat. Since it is vacation, I tend to splurge and eat things I normally wouldn’t, which, to some degree, is totally fine in my opinion! I also don’t expect to eat the same quality of food that I eat at home (i.e. grass-fed beef and organic produce). However, I still want to take care of my body and certainly don’t want to eat a ton of gluten or sugar and make myself sick. As far as eating meals at restaurants are concerned, I’ve got a pretty good handle on what’s the best option, and I can find something to eat at just about any establishment. Here’s what I usually order:

Mexican – fajitas minus the tortillas
Pub/sports bar – cheeseburger (no bun), side salad
Café – Cobb/chopped salad
Asian – sushi/sashimi (one of the rare instances when my “no grain” rule goes out the window!)
ItaBoldlian – Chicken Marsala, sub extra veggies for pasta
Fine dining – grilled salmon with steamed veggies

For me, the problem comes in when I don’t necessarily want a full meal, but I need to eat something. I tend to only eat two full meals a day and either fast unintentionally (meaning I’m not hungry so I don’t eat) or I nibble on a couple small snacks in between meals. Dave does the same thing so we always keep easy sources of protein on hand at home. Unfortunately, it’s pretty difficult to find a filling gluten-free, protein-rich snack in the vending machine at the airport or on the appetizer menu of most restaurants. This is where the importance of planning ahead comes in! Here are my favorite snacks to keep on hand when travelling:

Jerky – It’s hard to find good quality jerky without spending a fortune. We like to make our own when we can. Marinated strip steak dehydrated for several hours is our favorite (be sure to use plenty of salt as it’s necessary to preserve the dried meat).

Nuts – As I’ve mentioned before, soak raw nuts in saltwater for around 8 hours to make them more easily digestible and increase nutrient absorption. After soaking, dry in the dehydrator or oven until crisp.

Trail Mix – Make your own grain-free granola-like trail mix with this recipe from Mark’s Daily Apple

Lara Bars – These are great! They are made with a date/nut base and are flavored using dried fruits, veggies, and sometimes chocolate. Lara bars are a wonderful grain-free alternative to granola bars and don’t contain artificial stuff or preservatives.

Sweet Potato, Root Veggie, or Kale Chips – When I travel I know that I’m inevitably going to get a craving for something salty and, well, just plain bad. For these times, I like to bring along some gluten-free veggie chips. There are some pretty decent brands around and while they may contain vegetable oil and/or corn, I figure this is a much better option than a huge plate of nachos or French fries.

Dark Chocolate – Just as I sometimes get cravings for salty foods, I crave sweets at times too! That’s why I like to bring a couple good quality dark chocolate bars with me on vacation. If I have it with me then I won’t be as tempted to eat a huge piece of cheesecake or an ice cream sundae!

Hope these tips help on your vacations too!

Monday, February 6, 2012

A Little Catch Up and Some Curry Recipes

WOW – don’t the holidays just make life crazy for a while?! I’ve thoroughly missed being able to take time to research food and nutrition and share my journey with you all. Along with some delicious recipe suggestions, I want to mention where I’m at with my diet and health.

As I’ve been working more it’s become much more important to take the time out to plan weekly menus and have the appropriate ingredients on hand for well-rounded meals. Some weeks are better than others, but Dave and I have really started to master the concept of one-pot meals. We’re also working on the semi-daunting task of organizing all of our favorite recipes into our personal recipe “Encyclopedia. “

While my routine has changed a bit over the past several months, I’ve learned that it’s really never acceptable to be too busy to take care of myself. I’ve found that it’s ok to say “no” to an activity if I know I need some personal relaxation time. It’s also become increasingly important for me to make sure I allow myself adequate time to prepare meals in the evening. Not only is the act of cooking therapeutic (for me), but eating a nutritionally sound meal is also incredibly vital to my well being.

My workout routine has changed too, but I still make sure I have some time everyday to get some exercise. Usually that comes in the form of walking Ozzie, but that’s ok! I’ve found that a 30 minute walk on most days, combined with some light weights and yoga at home once or twice a week is adequate. As I’ve mentioned before, I think so many people overdo it with strenuous exercise, thus exacerbating inflammation and joint stress. It’s important to look at the big picture.

Some people ask if I’m “still on the diet.” I suppose the answer is yes, but I have to say I don’t consider the way I eat to be a “diet” in the modern sense of the word. This is the way I was designed to eat; I eat the food that best fuels my body. The more time I spend eating a Paleo diet and researching (and experiencing) its benefits, the more positive changes I notice in myself. I’m continually trying to find the best combination of foods to optimize my health. Now that I have my blood sugar under control, I’ve become open to eating more carb-rich foods on a regular basis. Of course, I still make sure I’m eating whole sources of food, grown organically and prepared properly (soaking and sprouting, for grains). Most notably, I’ve started to include quinoa, wild rice, and sweet potatoes in our weekly menu. These additions are more in line with the Weston A. Price “diet,” but I’ve always said Paleo eating is a hybrid approach for lots of people.

There are always things I wish I could do better, but doing the best that I can given the circumstances is admirable, at least I think so :) In the spirit of continual growth and development, here are my three health goals for 2012:

1) Eat more salmon and cold water fatty fish.
2) Spend less time at the computer and more time in the sun.
3) Learn how to make and can fermented foods.

And now for a few recipe ideas!

Curry is a spice I’ve recently added to my repertoire. Dave and I both have an affinity for flavorful, spicy foods, so curry is just the thing to spice up many of our dishes! Not only is curry delicious, but it’s also a powerful anti-inflammatory. Many of the curry recipes we enjoy are from Sarah Fragoso’s book, Everyday Paleo. If you haven’t checked out her website, you should - she has some awesome recipes and workout suggestions!

Here are our favorite curry recipes, which always have a place on our regular menu rotation:

1) Baked Cauliflower

Delicious and easy! We usually use coconut oil as opposed to olive oil due to the high heat, but either way is great.

2) Butternut Squash Soup
Traditional butternut squash soup is a little bland for me. This one takes it up a notch. With only four ingredients and very little prep time, you have to give it a try!

3) Butter Chicken

Time after time Dave has told me that this is by far his favorite dish. But, the one thing this recipe is missing is the curry! I add quite a bit, usually about a tablespoon or more, and sometimes even a pinch of cayenne to really spice it up! If you have it on hand, adding some masala and turmeric will really increase the flavor profile. I’ve found with this dish, the more spices the merrier! I also tend to substitute cream for the coconut milk, makes it a little more rich and creamy. Dave and I like this best serve over lacinato kale, but any green will do the trick.

4) Sweet Potato Hash
My version of sweet potato hash is a mix between the recipe above and another Sarah Fragoso recipe. Basically, I brown a pound of ground meat (usually spicy pork sausage), add as many veggies as I want (usually a couple bell peppers, a zucchini, and some mushrooms), two sweet potatoes, a couple tablespoons of coconut oil, ½ tbsp cinnamon and 1 tbsp curry. If we’re really hungry, I’ll throw a couple of fried eggs on top. Makes a great breakfast, lunch, dinner, or snack!

Tuesday, November 1, 2011

The Importance of Homemade Stock

I’m back! Life has gotten a little busier for me lately, so my blogs may be fewer and farther between for a while. Hopefully everyone interested has subscribed to my blog email updates.
I mentioned a few posts ago that I hoped to soon write about homemade stock - so here it is! I’m going to focus on soup-making, but keep in mind that homemade stocks can be added to a variety of other dishes and almost any sauce.

Could there be a more perfect time to discuss the deliciousness of homemade soup? I adore autumn and all that comes with it. Growing up in Missouri, I experienced very pronounced seasons and my favorite, by far, was fall. A large part of my “autumn enjoyment” comes from the memories I associate with this time of year, including all of those warm, aromatic comfort foods that I will always associate with “home.”

It was only a couple of years ago that I assumed the stock-making process was way too long and involved for my busy life. I remember reading instructions in a gourmet cookbook and thinking “forget it; I’ll just keep buying Swanson’s!” Finally, I tried my hand at making chicken stock and realized that it’s actually very simple and easily altered to suit taste, time constraints, and ingredients on hand. I truly wish more people would embrace homemade stock-making, as it seems to have become a lost art in our busy world today.

Along with being beyond yummy, homemade stock is incredibly nutrient dense. If made with quality bones from healthy animals, stock can truly be a healing food. In many cultures, throughout history homemade soup was often the first treatment for those feeling ill. Modern research has actually confirmed the truth behind this ancient wisdom, as components of the cartilage used in stocks have been used successfully in the treatment of various ailments. Unfortunately, most people reach for that can of Campbell’s instead of taking the time to create soups from homemade stock.

Another interesting property of homemade stock is its ability to aid with digestion. Traditionally, many cultures begin their meals with a bowl of soup. Perhaps we have simply become accustomed to soup as a starter food, but there is actually a reason behind this practice. Cooked foods are generally more difficult to digest than raw foods; however, homemade stock is the exception to the rule. Stock contains gelatin which makes digestion much easier. If you frequently have trouble with digestion, it may be a good idea to look into adding homemade stock into your daily diet.

I make three different stocks at my house: fish, chicken, and beef. I make chicken stock with the most frequency since I find it’s more universal in recipes. I purchase whole chickens from the farmers market each month and usually roast the chicken first and then and use the bones to make stock. I also like to slow cook the whole chicken (meat AND bones) in a pot of water, veggies, and spices to create a more rich and flavorful broth. Beef “soup bones” are pretty easy to find at the farmer’s market and very reasonably priced. Fish stock is a little more difficult to make since I live in a landlocked state with limited access to fresh, good quality fish. If I can get my hands on some non-oily fish, I’ll use that to make fish stock. Otherwise, bonito flakes boiled with water and vinegar makes a lovely broth.

Here is my basic stock-making process:

1) Place bones into a crock pot (I usually fill it about 2/3 full).
2) Slice a carrot, celery stalk, and onion and add to crock pot.
3) Add a couple of whole garlic cloves, fresh or dried herbs, salt and pepper.
4) Add a tablespoon or two of vinegar (this step is important – the acidity in the vinegar helps draw minerals into the stock).
5) Fill crock pot with water, almost to the top.
6) Simmer on low to medium heat for anywhere from four hours up to a couple of days.
7) After straining, pour stock into jars and refrigerate for several hours.
8) If there is a layer of fat on top of the liquid in your jars, remove it before freezing.

Making homemade stock shouldn’t be stressful and you shouldn’t feel restricted by a recipe. Remember that the longer you cook the stock, the more flavorful it will be. Availability of spices or vegetables shouldn’t affect your ability to make stock. Use what you have on hand and season to your liking. Also, keep in mind that commercially raised chickens often won’t produce gelatinous stock – another reason why it’s very important to purchase quality poultry and meat products. There are many different kinds of bones that can be used in stocks, so don’t limit yourself. If you find something interesting at a farmer’s market, go for it. Chicken feet make an incredibly gelatinous stock, as gross as that may sound! One of the lessons we can learn from making stock is the idea that every part of an animal should be used and nothing wasted – another concept seemingly lost in society today.

Once you have made the stock, it will keep for months in the freezer. When you are ready to make soup, use your imagination! My favorite soup to make is a simple chicken and vegetable soup, but the options are limitless. Try some experimenting and come up with your own version of something that’s been around a while. Or, pull out that recipe for your favorite tried and true soup recipe - one that reminds you of “home.” I’ll never forget my Grandmother’s delicious homemade noodle soup. Made with homemade stock and noodles from scratch, this recipe is simple but will always hold a place in my heart (and recipe box). To this day, if you placed a bowl in front of me, I’d eat it every last bite, gluten and all :).

Friday, August 19, 2011

Raw Food: Musings and a Recipe

A couple of months ago I was at the library in the cooking section. I had gotten a little tired of all the usual recipes I prepare and wanted to try something new. Usually I just skip right over the vegan/vegetarian section unless I am specifically trying to find a new veggie recipe. However, this time, kind of on a whim, I grabbed a raw foods cookbook and curiously glanced through the recipes. The food looked delicious and interesting so I added the book to my pile.

Of course I’m not interested in adopting a vegan diet and most certainly not a raw foods diet, but I as I mentioned in my last post, I think it’s vital to keep an open mind. For those unfamiliar with a raw foods diet, it basically encourages consumption of foods in their “living” state, so heating anything over 118 degrees Fahrenheit is a no-no. It’s like the vegan diet on steroids. I like the basis of the raw foods diet: using fresh whole ingredients, buying produce locally and seasonally, and refraining from consumption of processed foods. But, there are some claims by raw foodists which I think can be somewhat misleading to those unfamiliar with nutrition.

In the cookbook I borrowed from the library, the authors mentioned that people following a raw foods or vegan diet can obtain their full requirement of omega-3 fatty acids from foods like flax seed and walnuts. Unfortunately, these foods only possess the plant-based form of omega-3 and therefore do not contain valuable DHA and EPA which are only found in animal sources like cold water fatty fish (and algae). The body is able to convert some of the ALA found in plants-based sources of omega-3 into DHA, but it does so only in very small amounts.

The authors also claimed that raw foodists would be able to fufill all of their vitamin A requirements with plant-based sources as well. However, true vitamin A only comes from animals and is especially dense in liver. Some vegetables contain carotenoids (like betacarotene in carrots) which the body converts to retinol (the functional form of vitamin A). The problem with obtaining all of the required vitamin A from vegetables is that the body needs about three to four units of carotenoids to make one unit of retinol. This means you’ll have to eat an absurdly impossible amount of veggies just to meet daily vitamin A requirements. The conversion mentioned above is just an average; some people are able to create more retinol, some less, but never a one to one ratio.

I found several more statements of concern throughout the book and was glad that I had the knowledge to recognize these fallacies…otherwise I might be a raw foodist myself! This is exactly why it’s so important to do your own research and figure out what’s really best for your body. No one book or documentary or blog or author or doctor can ever give you the answers you really need to live a healthy life. It’s an ongoing journey in which we all need to be proactive.

Ok, now that I have that tidbit aside, back to the raw food recipes! I actually found most of the recipes to be quite intriguing. Dave and I bought a dehydrator recently otherwise I wouldn’t have been able to make very many of the recipes. None of the raw foods I made came out perfectly, but I will definitely do some more experimenting. If you do have a dehydrator, I would highly recommend making a grain-free, vegetable-based wrap…and here’s how:

2 zucchini
1 ½ cups ground flaxseed
2 cups water
1 tbsp. psyllium powder
1 garlic clove
Pinch of salt
4 tbsp fresh herbs OR 2 tbsp dried herbs*

*For the herbs, use whatever fresh you have on hand or your favorite combination of dried herbs. Oregano works really well with this recipe.

Combine all ingredients in a food processor. Dehydrate at 110 degrees for 5-6 hours.

The first time I made these I wasn’t sure if I had dried them too long or not enough! When spreading the mixture in the dehydrator, try to spread it as evenly as possible - this will help when you are trying to determine whether or not the wraps are done. Psyllium husk is supposed to add flexibility to the wraps, which is why I’ve included it in this version. I’ve also read that soaked chia seeds may help with making the wraps more “wrap-like.” Be sure to flip the wraps halfway through and keep an eye on them to make sure they don’t get too crispy. But if they do get crunchy, then you have some yummy zucchini crackers! The original recipe I made from the book was a little "blah" so I added some spices to make it more palatable.

Experiment with this. It’s definitely not the same as a warm, soft flour tortilla, but it’s a healthy and fun alternative!

Friday, July 1, 2011

Taco Night!

I love being in the kitchen. Obviously. If I have the time, I truly enjoy spending a couple of hours cooking up an elaborate meal. But life happens and often I don’t have that kind of time to prepare our food. On those days I greatly appreciate my favorite quick and easy go-to recipe. I’m sure most people have some version of “taco night”, and at Casa De Huling, ours happens to be a “taco-less taco night.”

When I was a kid I loved taco night. It was awesome. All that yummy seasoned meat, cheese, and veggies was so fun to assemble on my plate. My mom always set it up like a taco bar, so we could pick and choose what we wanted to have on our plates. Dave and I do our taco night the exact same way, but with a few menu variations.

At first we felt more than a little lost without that humongous, white tortilla to wrap everything up in. I think Dave actually got a little teary-eyed when I told him I would no longer be cooking with tortillas. But after some contemplation, we’ve discovered some equally delicious and far more nutritious alternatives to the tortilla or taco shell. Try any of these ideas as your “taco base”:

Romaine or Iceburg Lettuce
Red or Green Shredded Cabbage
Soaked, Sprouted, and Cooked Quinoa

You can’t rightly have taco night without any meat now, can you? One of the fun things about this meal is that you truly can improvise and it will still taste delicious. I get the best results using lean ground beef, but you can also use ground turkey, ground bison, or ground chicken. If you’re a fan of heat, kick it up a notch and use equal parts of spicy ground pork sausage and ground beef. I have a never fail homemade taco seasoning that I usually make ahead of time and keep in my spice cabinet. Having the seasoning pre-made is definitely a time saver. Here’s my basic taco seasoning recipe:

1 tbsp chili powder
¼ tsp onion powder
¼ tsp garlic powder
¼ tsp red pepper flakes
¼ tsp oregano
½ tsp paprika
1 ½ tsp cumin
1 tsp sea salt
1 tsp black pepper

Brown 1 lb. ground meat and drain off fat, if necessary. Mix 2 tbsp. of the seasoning mix with 1 ½ cups of water and pour over the ground meat. Simmer, covered, for 10-15 minutes. If the seasoning mix is too spicy, omit the red pepper flakes. If you have any leftover, the seasoned ground meat makes a delicious breakfast the next morning. Poach or fry a couple of eggs and serve on top of the ground meat.

I like to include as many veggies as possible in my meals, and taco night is no exception. Of course for the tastiest tacos, homemade guacamole or sliced avocado is mandatory, along with some diced tomatoes and chopped fresh cilantro. Time permitting, I also like to do a fajita type thing and sauté a couple bell peppers, an onion, and a few garlic cloves together and then add to the seasoned meat.

For those of you still eating dairy, adding a bit of cheese or sour cream to the top of your taco is really like putting the icing on the cake (bad analogy for a paleo blog, I know!). Since we don’t usually have sour cream at our house, sometimes I’ll use full fat plain yogurt which adds the texture I like but is lacking a bit in richness. As for the cheese, I know a lot of people like it until it’s bubbling, but I will mention that cheese is much easier to digest when not melted. However, I don’t think a little melted cheese every now and then ever killed anyone :).

So that’s my taco night. You can get as crazy you want with the add-ons or just keep it simple by browning some ground meat with seasoning and throwing it over a few fresh lettuce leaves. Voila. You’ve got your fat, protein, and veggies. Maybe not the most nutrient dense meal you've ever had, but it's easy, it satisfies, and it makes some delicious leftovers for breakfast the next morning!

Thursday, June 9, 2011

Easy Summertime Salad


I love summer for many reasons, but the abundance of fresh produce, especially berries, is right at the top of the list. My favorites are raspberries and strawberries and I’m discovering more and more ways to incorporate berries into my meals. For breakfast, a simple coconut milk berry smoothie is easy to make in a pinch. Often I’ll mix plain full fat yogurt, cinnamon, berries and maybe a touch of honey together to make a satisfying snack or even dessert. There are tons of yummy sauces, salsas and chutneys made using berries and most are a wonderful accompaniment to meat dishes, especially pork. Today, I’m going to share my recipe for a quick and easy mixed greens salmon salad with fresh berries and balsamic vinagrette, perfect for lunch on a hot summer day.

Before I share my recipe I have to mention the most recent love in my food life: Taylor Organic Baby Herb Salad Blend. I’ve never been big on salads, especially packaged salad mixes, but let me tell you this is something else! I love the unique mix of herbs and greens, including arugula, dill, cilantro, beet greens, swiss chard, spinach, and romaine. Most of the time I’ll use this blend to make salads, but it’s also great underneath a couple of fried or poached eggs for breakfast. Using this salad blend along with some fresh berries, I created a quick go-to recipe for breakfast, lunch or dinner.

Salmon, Herb, and Berry Salad

2-3 cups Taylor Organic Baby Herb Salad Blend
1-6oz. can Wild Alaskan Salmon, drained
Small handful of fresh berries (blueberries, blackberries, raspberries, sliced strawberries)
1 tbsp. chopped almonds

Balsamic Vinaigrette

1/4 cup olive oil
1 tbsp balsamic vinegar
1/2 tsp Dijon mustard
Salt and pepper, to taste

Assemble the salad, drizzle the vinaigrette on top, and enjoy! If you have the time and want to dress up the salad a bit more, add some feta cheese crumbles, avocado slices, grape tomatoes, or any of your favorite veggies. If you don't have the salad blend on hand, use whatever greens you have in the fridge and throw in some snipped fresh dill and cilantro to add some extra flavor.

Tuesday, May 31, 2011

Summertime Ribs

For those who don’t know, Dave and I recently bought a condo right outside of the downtown area. Originally, living in this type of space was not something we had even considered doing because we love being outdoors and grilling, gardening, and entertaining. The more we looked at the pros and cons, we realized a lot of our stress originated from trying to maintain a yard, garden, and house while keeping an appropriate amount of balance in our lives. Not to mention the amount of driving we were both doing daily to get into the city was horrendous! Now we’re in a much smaller place with less stress but not as much outdoor space. Since it’s only our first year here, we’re still figuring out how to make the best use of the balcony and decided to give it a shot this past weekend. With some work, we converted our concrete balcony into a little garden paradise in the middle of the city.

Unfortunately, one of the things we weren’t able to keep in our outdoor space was our beloved grill. As I mentioned before, grilling is a favorite summer pastime in our household, so saying goodbye to our monster of a grill was a pretty hard thing to do. However, it opened up some much needed space on our balcony and allowed us the room to plant a great variety of veggies and herbs. But, as I looked out onto our empty balcony last week after carting our grill away, I wondered how I would still be able to cook delicious summer time favorites sans grill.

Amidst my musing, I was pleasantly surprised to learn that beef back ribs would be on sale over Memorial Day weekend at the farmer’s market! Ribs were the perfect answer to my question as they definitely evoke that summertime feel and can also be made deliciously (without a grill) by slow cooking in the oven. As an added bonus, ribs are one of my husband’s favorite foods, along with chicken wings, so I indulge him every now and then :).

How I Learned to Make Ribs

As one would expect, I’ve certainly had my fair share of comfort foods and BBQ growing up in Missouri. But it wasn’t until I was in college in southwest Missouri that I learned the secrets to making the perfect oven cooked ribs. No, I didn’t learn this while working in a restaurant; I actually learned how to cook ribs in my entrepreneurship class! I worked with a team of students assisting a curmudgeonly old man who planned on using his entire life savings to open a BBQ restaurant. This guy may not have been cut out for the business world, but he wasn’t lying when he said he knew how to cook southern style eats. His food was delicious and while he did share a few secrets to making great ribs, he wouldn’t give everything away. Funny thing is, I didn’t even make use of his advice until several years later when I met Dave and found out about his rib obsession. My technique is a combination of what I learned from the BBQ guy and what I’ve discovered in the past couple of years making ribs at home.

A Few Words of Advice

Making the perfect ribs is really all about having enough time to go through all of the steps listed below. If you plan to throw some ribs on the grill and think they will come out moist and tender, think again. Slow and low is the best piece of advice I can give anyone who wants to prepare ribs that everyone will love. Keep in mind that most of rib-making is an art, not a science. Tailor the recipe to your liking and don’t worry too much about exact measurements. While you can follow the instructions below for virtually any type of ribs, I find my dry rub recipe tastes best on pork ribs.

A quick note to those who are a little oven-shy: Yes, this recipe requires using an oven in the middle of summer, but keep in mind we’re cooking at a pretty low temperature. In any case, I understand this will heat up the house, but trust me it will be well worth it! Turn on a fan, crank up the AC, or better yet sit outside in your own garden oasis while you wait for these bad boys to cook.

The Perfect Oven Baked Ribs

Step 1: Create a brine to soak your ribs in for a couple of hours. The ribs are going to sit in the oven for quite some time and we don’t want them to dry out. Brining the ribs will help them retain some moisture while cooking. The most basic brine is water mixed with salt. A gallon of water and ¾ cup of salt is a good reference point. Some people use more salt, some less. You could omit the salt completely, but keep in mind that the less salt you use, the longer it will take your meat to absorb the moisture. Cover the ribs with the brine and soak in the refrigerator for one to two hours, depending on the thickness of the ribs. Don’t over soak the ribs or they will become too salty. If you like, add a couple teaspoons of your favorite spices to the brine.

Step 2: Now we are going to dry rub these suckers. Before applying any of the dry rub seasoning, dry off the ribs completely. Rub in the spices until the ribs are covered, using the seasoning liberally. My favorite dry rub recipe is at the bottom of this post, but feel free to use any of your favorite commercial rubs or better yet, make your own. Wrap the ribs in plastic wrap and refrigerate for several hours.

Step 3: It’s time to make the braising liquid. The braising liquid, along with the heat in the oven, will break down the tough connective tissue of the ribs but keep them tender at the same time. I make my braising liquid by mixing the approximate measurements of the following ingredients: 2 cups chicken or beef stock OR beer, 2 tbsp. maple syrup or honey, ¼ cup white or apple cider vinegar. Heat the braising liquid on the stove until it simmers for several minutes. Remove from heat and, while cooling, lay the ribs on pieces of foil. Once the braising liquid is cool, spoon it over the ribs but make sure the liquid stays inside of the foil with the ribs. Close the foil packets and seal them tightly, place the ribs in glass baking dishes, and cook in a 250 degree oven for 2-4 hours, until cooked through.

Step 4: Glaze with BBQ sauce and enjoy! I usually make my own BBQ sauce, and for this recipe I think it’s especially important. You don’t want to spend all this time making the perfect ribs and then throw a bunch of KC Masterpiece all over it, do you? My favorite BBQ sauce recipe is at the bottom of this post, but if you must use a commercial sauce I won’t hold it against you. At least you made it this far :). Once the ribs are cooked to your liking, open up the foil packet and spread some BBQ sauce on top of the ribs. Broil on high in the oven uncovered for 2-5 minutes or just long enough for the BBQ sauce to glaze over the ribs. Be careful not to overcook them or you’ll ruin all of the hard work you just did. Your ribs are ready to eat now, enjoy!

Have a Little FunI’ll admit ribs aren’t the healthiest option out there. Yes, they can be salty and fatty but making them yourself every once in a while can be pretty rewarding. One of the most valuable lessons I’ve learned in life is to enjoy things without feeling guilty! I have a special diet, as do many people reading this blog, but I am not a slave to my eating habits. Obviously, if you are allergic to something or have a severe reaction to certain foods, then you shouldn’t include it in your diet, even as a treat. As I’ve heard several primal/paleo enthusiasts say recently, it’s vitally important to find pleasure in life and allow imperfection every once in a while. Mark Sisson has a great take on this and calls it the “80/20 Principle.” The basic concept is to aim for your goals 100% of the time, but allow yourself some wiggle room in there. In the end, if you meet your goals (dietary, fitness, etc.) 80% of the time then you have probably done a good job finding balance. Certainly, for people following a paleo diet (or any diet) this is very important to understand. It’s so easy to get caught up in what’s paleo and what’s not paleo but there’s really more to it than that. There is also an element of changing your mentality to NOT take things as seriously and calm down! By that I don’t mean it’s ok to binge on candy and soda, but if you do eat something you shouldn’t have, please don’t stress about it. I’m still learning how to do that myself, but I know how much progress I’ve made and what a difference changing my mindset has made in my life. Along with self-discipline, I think stress-elimination is a foundation of primal living in particular, and a great lifestyle goal in general.

Altering Recipes
Please keep in mind that most recipes can be altered to fit your lifestyle or taste preferences, especially if you’re cooking with a whole foods mentality and avoiding most processed foods. If you’re not cooking or eating with a whole foods mentality, try to get there. If you don’t know what the heck something was made out of or don’t think you could make it yourself, then don’t eat it! As you can see, I’ve omitted most of the sugar that usually shows up in rib recipes. I don’t want to eat that stuff, so I try to avoid it at all costs. Although a certain amount of salt is necessary for optimal health, if you’re concerned about the salt content of this recipe try making your own dry rub with very little or no salt. Do the same with the ketchup for your BBQ sauce, and soak your ribs in water only instead of the brine. Give it a try this summer, especially if you’re looking for a grill-free tasty meal!

Simple Dry Rub Recipe:

4 tbsp paprika
4 tbsp chili powder
1 tsp cayenne
4 tbsp sea salt
4 tbsp oregano
4 tbsp garlic powder
4 tbsp onion powder
1 tbsp black pepper

This is a recipe I came across a few years ago and tweaked to my liking. Originally, the recipe called for one cup of brown sugar, but I’ve completely omitted that in my version. If you are looking for more of a balance of sweet and salty, adding a bit of brown sugar to the rub will do the trick.

BBQ Sauce Recipe:2 cups ketchup (preferably homemade, or commercially made without HFCS)
1 cup water
½ cup apple cider vinegar
4 tbsp honey
½ tbsp black pepper
½ tbsp onion powder
½ tbsp ground mustard
1 tbsp lemon juice
1 tbsp Worcestershire sauce

Mix all ingredients together in a saucepan and heat to a boil, then turn down to simmer. Cook for one hour, stirring occasionally.

This recipe is originally from Down Home Cooking With the Neelys on the Food Network website and it was so good that I only made one adjustment…substituting honey for the sugar. It’s absolutely delicious!

Thursday, May 26, 2011

Raw Milk is Scary, Right?


It wasn’t long ago that I remember being terrified and, quite frankly, disgusted by the thought of drinking raw milk. Along with the majority of Americans, I have been programmed to think that raw milk is dangerous while pasteurized milk somehow holds the key to better health. Just a few years ago, I remember chugging glass after glass of tasteless skim milk because I believed it alone could fulfill my need for essential nutrients like calcium and vitamin D.

Last summer amidst my research, I was introduced to the idea that raw milk is not only nutritionally superior to pasteurized milk, but also that the latter is really not beneficial at all. At first I scoffed at this idea, remembering all the horrific stories I had heard about the contamination of raw milk. As I started to open my mind a bit more and look at the facts, I began to think that maybe the American public had been led astray. However, due to my stubborn nature (thanks for the Irish genes, Dad!), these concepts were still pretty hard to accept. But, while combing through some articles on the Weston A. Price website one evening, something hit home as I began to read about the traditional practices of family farms.


My mom grew up on a farm. Sometimes, when I tell people that, they instantly start in with their judgments. A common misconception is that people who live on farms (especially in the Midwest, where I’m from) are ignorant and lack the mental capacity required to make educated decisions. While I can’t speak for everyone, I do know that in my experience this is absolutely NOT true. Traditional family farms, which are few and far between these days, follow much of the same treasured wisdom that our ancestors passed down generations ago. Sadly, a large part of this wisdom has been devalued and even forgotten in modern society. The pasteurization of milk is an excellent example of this. My mom can recall drinking tall glasses of fresh milk straight from the cow for breakfast during many of her childhood years. Although pasteurization was already in full swing when my mom was growing up, my grandparents were not at all concerned about contamination of their raw milk. Instead, they reminded my mother and her brothers how precious this food was for their health. By the time I came into the picture, my grandparents had scaled down their farm and long since gotten rid of their dairy cows, but I always thought those stories my mom told of drinking fresh milk were pretty cool.


A Violent Process


I recently heard the pasteurization process referred to as “violent.” After learning about it myself, I really can’t argue with that statement. When milk comes out of the cow, it is a living food with so much to offer. Pasteurization literally takes the life out of milk. It kills essential organisms and bacteria that help strengthen the immune system and protect against disease. Pasteurization also destroys lactase, the naturally occurring enzyme in milk that is required to digest lactose (milk sugar). Valuable nutrients that naturally occur in raw milk are fragmented during processing, often to the point where they are no longer beneficial. Pasteurized milk is frequently vitamin-fortified, meaning that the vitamins which were destroyed in processing have to be added back into the milk via more processing. Homogenization goes a step further and destroys nutritious fat globules by passing milk at very high speeds through a filter. By the time pasteurized milk gets to the consumer, it’s really just another processed food.


Allergies, Intolerance, and Raw Milk


I do want to briefly touch on lactose and casein sensitivities since I know they are a very real concern for many people. As I mentioned above, raw milk contains an enzyme called lactase that helps the body digest milk’s sugar, or lactose. Since pasteurization has been pretty main stream for the past one hundred years, many people no longer produce lactase in their gut. These people have trouble digesting milk and are referred to as lactose intolerant. Thankfully, I’m NOT one of those people, but I do feel pretty sorry for those that are. If you are lactose intolerant, remember raw dairy contains vital enzymes that will help your digestion, not hamper it. From what I’ve read and heard from others, it’s best to start with small amounts and work your way up to a full glass of milk. As you introduce more lactase into your body, it will more easily be able to digest lactose. This seems to work for most people and hopefully it will work for you too! If you are one of the unlucky few who just can’t seem to digest raw milk, there is also the option of trying fermented dairy products like yogurt and kefir, both of which can be made at home using raw milk. Fermented dairy products contain bacteria that make digestion even easier and usually don’t cause problems with even the most sensitive stomachs. Fermented dairy products are also an alternative to raw milk for those with casein allergies. The fermentation process predigests casein, making it much more tolerable for those with allergies.


A Little History


It’s certainly important to understand the reasoning behind pasteurized milk in the first place. By the end of the 19th century, there were some very serious problems with the conditions of milking parlors in highly concentrated cities like New York City and Boston. At that point in time, cows lived in confinement, wading in their own waste and eating things that no living being should be forced to eat (not much different from some factory farms today). People became very sick and many even died from diseases which were passed on to humans through contaminated raw milk. Pasteurization was a solution to a very serious problem, but, arguably, not the best solution. Instead of addressing the obvious issue at hand – sanitation of the milking parlors and diet of the cows – law makers decided to make pasteurization mandatory. With various political and economic interests stirring the pot, this story has many different angles but it’s truly a shame that so many people were able to justify the destruction of such a healthful food.


If you look at the numbers today, raw milk is not the health threat that it once was. In fact, you are assuming more risk by consuming fresh produce than drinking a glass of raw milk. It’s important to remember that raw milk has built-in mechanisms to help protect against contamination even if pathogens are present. Since the pasteurization process kills off beneficial bacteria, pasteurized milk has no way to fight off infection. If you’re interested in looking at specific studies involving raw milk vs. pasteurized milk and its effect on health and safety, check out the Realmilk.com website.


Raw Milk Availability, Denver and Beyond


The laws regarding the sale of raw milk vary from state to state. While it’s legal to sell unpasteurized milk for human consumption in a few states, most have passed laws making it illegal or very difficult to obtain. Fortunately, here in Colorado we are able to buy “cow shares” to get around this legality. By paying a one-time fee to purchase the share in addition to a monthly or yearly boarding fee, consumers can get fresh, raw milk each week from a local dairy. Since the share owners technically own a portion of the cow and never pay for the milk directly, this practice is not a violation of Colorado state law. Sadly, some states have even made share owning illegal.


My Personal Raw Milk Experience at Windsor Dairy


The decision to “go raw” was a big one for Dave and me. As I mentioned earlier, it was quite a step for me to even consider drinking unpasteurized milk, but the facts do not lie and it’s easy to see how much healthier a whole foods approach is. In the beginning, I expected to have a hard time finding a raw milk dairy, but I was pleasantly surprised by the many local dairy operations there are to choose from in the Denver area. We ended up settling on Windsor Dairy for several reasons:


1) Windsor is the only dairy in the country, raw or otherwise, that tests every batch of milk for milk-borne pathogens (listeria, e. coli, campylobacter, salmonella).


2) All cows are 100% grass-fed and hormone/antibiotic free.


3) They are certified organic.


4) Our downtown farmer’s market, Denver Urban Homesteading, is a weekly drop-off site.


After researching Windsor and being thoroughly pleased with what we learned, Dave and I decided to visit the farm. They hold free tours every Friday and Saturday at 3pm and actually require a visit to the farm prior to purchasing a share, so we were happy to check out the operation. On one of those strange spring-like days in the middle of January, we made the trek up to Windsor to buy our cow share. As we got out of the car, we were greeted by a couple of hogs, and a herd of goats. We could hear chickens clucking and saw a flock of lambs in the distance. After walking around the farm and visiting all of the animals, we went into the milking parlor to observe the milking process. It was a cool experience that I would recommend to anyone, even if you’re not interested in the raw milk stuff. It was definitely a breath of fresh air to see farm animals living happy and healthy lives as they were intended to.


For those interested in other farm fresh foods, Windsor Dairy has a store located on the farm offering beef, lamb, chicken, pork, eggs, and raw cheese. In addition to cow shares, they will soon be offering raw goat milk shares. Share owners receive a discount on most products. If you’re interested in purchasing some of these items but can’t make it up to Windsor, check out one of their drop-off sites in Boulder, Denver, or Fort Collins. They also offer cheese, cream, and butter making classes on-site throughout the year.


Raw Milk and Financial, Ethical, Personal Concerns


So, I’m sure you’re wondering just how expensive it is to drink raw milk every week and if it’s worth the price. Here’s how I see it:


1) Health. Raw milk contains lactase and other probiotics to aid digestion. It contains naturally occurring forms of essential nutrients and is full of beneficial bacteria that strengthen the immune system. Raw milk is an excellent source of healthy fats which are vital for nervous system health, especially for children. Pasteurized milk cannot make any of the aforementioned claims.


2) Safety. The raw milk I drink is always tested for the four main food-borne pathogens before it is given to share owners to consume. The same can’t be said for ANY brand of pasteurized milk. Plus, raw milk contains probiotics and bacteria that will help fight pathogens if they do happen to be present. Lastly, raw milk dairies often have feeding regimens and living conditions that are far superior to those of conventional dairies which ensure the safety of the end product.


3) Peace of mind. I know exactly where my milk comes from. I know exactly where the cows that produce this milk live. I know exactly what they eat, and I can visit them at any time.


4) Local. By drinking raw milk, I’m supporting local business and sustainable farming practices.


5) Personal/ethical reasons. I feel good about helping these cows lead pastured lives. I also strongly oppose conventional farming practices involving corn, soybeans, and grains which destroy topsoil, so I like to encourage pastured-raised animal products.


We DO pay a premium to have such great quality milk every week. Windsor Dairy allows consumers to purchase a half share or share of a cow. A half share (which is what we have) is a half gallon of milk per week and a share is one gallon of milk per week. We paid $25 to purchase the share itself and our boarding fees are about $17 per month. If you do the math, that’s a little over $4 per half gallon. Yes, that’s a lot but it’s worth it to us. Of course, we are only a family of two, so if your family is larger or you have kids then this starts to add up pretty quickly. In the end, this is a personal decision.


Regardless of how you feel about raw milk, I think it’s important to remember that there ARE still family farms, just like my grandparents’, that understand the wisdom in traditional food preparation. Not all cows are factory farmed. Not all cows are crammed into a feedlot and stuffed full of grain and corn. Some actually do live quite happy and healthy cow lives on green pastures and these are the types of operations we need to support because they enable us to lead nourished lives.