Discovering everyday "joie de vivre" through food, style, and inspiration

Welcome! Join as we discover both spectacular and simple joys alike, remembering that life is a journey and it's up to each of us to make it special. Along the way, I'll share some of my original gluten-free recipes, book recommendations, DIY projects, style and decor tips, and plenty of inspiration. Thanks for visiting!

~ Kayla McGuire


Showing posts with label Recipes. Show all posts

Monday, January 7, 2013

Slow Cooked Beef Brisket with Homemade BBQ Sauce


Along with whole chicken, beef brisket is another one of those meats that I had no desire to mess around with prior to about a year ago.  When it comes to red meat I tend to stick with the ground variety, largely because I just don’t like the texture of other steak-like cuts.  It wasn’t until I had regularly frequented the farmer’s market for about a year that I finally decided to try something a bit unfamiliar.  Dave suggested the brisket, and I, having no clue what to do with that two and a half pound cut, was understandably a little wary.  I forget how we cooked the brisket that first time, but what I do remember is that it was nothing like what I thought it would be.  Slow-cooking is really the best way to go and I find when properly cooked and served with a flavorful sauce, brisket can be moist and quite delicious.  While brisket isn’t a staple in my weekly menu, I do enjoy serving it from time to time, especially when I see a nice one at the farmer’s market.  Enjoy my recipe below!

For the barbeque sauce:

  • 2 cups ketchup (use a corn syrup-free brand)
  • 1 cup water, room temperature
  • ½ cup apple cider vinegar
  • ½ cup honey
  • 1 tablespoon lemon juice
  • 1 tablespoon Worcestershire sauce
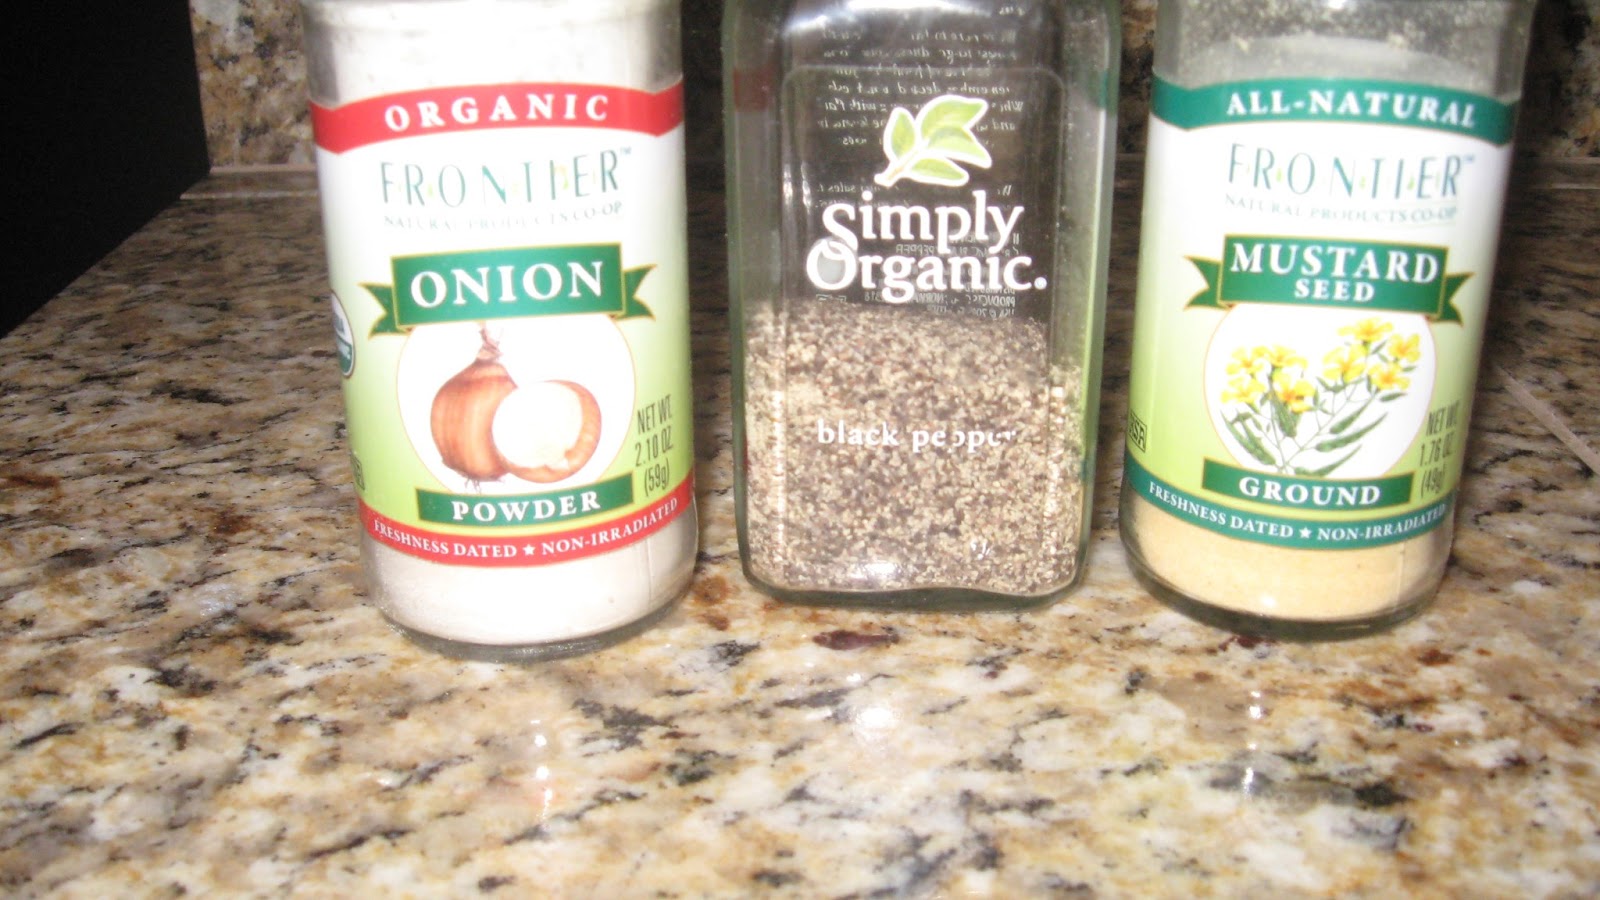
  • 2 teaspoons black pepper
  • 2 teaspoons onion powder
  • 2 teaspoons ground mustard


Combine ingredients in a medium saucepan.    


Place over medium-low heat and simmer for 30-45 minutes.  Remove from heat and let cool.


For the brisket:

  • 2-2.5 pound beef brisket
  • Salt
  • Pepper
  • 2 cups barbeque sauce (recipe above)


Lightly salt and pepper the brisket.  Place in a slow cooker.  

Smother brisket with barbeque sauce.  Turn slow cooker to low and cook for 2 hours, turning brisket after 1 hour.  


Remove from slow cooker and slice into ½ inch strips.  Serve with remaining barbeque sauce.

Sunday, December 30, 2012

Roast Chicken – My Favorite One Pot Meal


For years I was under the impression that roasting a chicken was hard work.  Perhaps it’s because I haven't known too many people who prepared a whole bird or maybe I assumed there was more to it than there really is, but in any case, I stayed far away from whole birds for quite some time.  As I have more recently learned, roasting a chicken is actually very simple and is a great dish to make when you don’t have a lot of time or energy for food prep.  A roast chicken with a simple salad can be a lovely dinner to serve for company, allowing the host to focus on spending time with guests as opposed to overheating in the kitchen! 

I usually get my whole birds from the Denver UrbanHomesteading farmer’s market at the Ranch Foods Direct stand.  Not only are the chickens local and good quality, but the prices are also quite reasonable and much more budget friendly than purchasing chicken breasts or tenders.  There is also the added bonus of being able to make your own chicken stock with leftover bones, another great savings measure (see my tips for making stock here).

Roast chicken in its most simple form is obviously gluten-free; however,  keep in mind that some restaurants may serve roast chicken with a gravy or sauce that usually contains flour and is NOT safe for the gluten-sensitive folks.  For an easy alternative to what you may find in a restaurant (and equally moist, I might add), take a look at my gluten-free Lemon Herb Roast Chicken recipe below. Oh, and Happy New Year!

Lemon Herb Roast Chicken

·         1 whole chicken, 3-4 pounds, giblets removed
·         1 yellow onion, thinly sliced
·         2 heads of garlic, cut in half
·         5-6 tablespoons butter, melted
·         2 lemon wedges
·         3 fresh rosemary sprigs(or 1 tablespoon dried rosemary)
·         3 fresh thyme sprigs (or 1 tablespoon dried thyme)
·         Sea salt
·         Pepper
·         1 cup chicken broth or water


Preheat oven to 375 degrees.  Place onion slices and cut garlic in the bottom of a roasting pan.  Place chicken on top of onions and garlic.  Stuff the herb sprigs and lemon wedges into chicken cavity.  Brush 2-3 tablespoons of melted butter on the side of the chicken facing up.  Season with sea salt and pepper.  Pour broth or water into roasting pan, taking care not to pour directly on the chicken.  Place in oven and roast for 45 minutes.  Remove from oven, turn chicken over, and brush with remaining melted butter.  Season with sea salt and pepper.
  

Place in oven and roast for 45 minutes.  Chicken is cooked when juices run clear.  For extra crispy skin, broil on high for an additional 1-2 minutes after chicken is cooked through. 


Tuesday, December 18, 2012

Easy Appetizer Menu for Your Next Party!


Are you hosting a party but perplexed about what to serve?  Perhaps you haven’t had the time to think about your party menu and now it’s crunch time.  Whatever the case, we’ve all been there, with our best of intentions to throw an amazing party, only to be beaten by the clock.  It’s these occasions when I employ my “easy appetizer” menu.  Classier than serving chips and salsa but yet much easier to prepare than a gourmet spread, sometimes easy appetizers are undoubtedly the way to go. When planning a party, remember to inquire as to whether any of your guests have food restrictions and plan accordingly.  If you are serving appetizers a la my suggestions below, you will find that most special diets are easily accommodated.  Here are my recommendations, perfect for any occasion, any time of year:

Crackers Nut Thins are gluten-free and come in a variety of flavors.  My personal favorite flavors are Smokehouse and Sea Salt.

Cheese – Offer several varieties, such as a simple mild cheddar or Monterey Jack, a soft cheese like Brie, and a harder cheese or one with a bit more depth.    

Sliced deli meats – Prosciutto is always a hit.  Thinly sliced salami is another great option. 

Jam – Recently, I came across this fig spread at Whole Foods and had to try it.  I served it with prosciutto, crackers, and Brie, and found it to be absolutely delightful.  This is definitely a new staple on my appetizer menu.

Veggies – The easiest to serve are baby carrots, but it’s nice to offer something green as well.  Cucumbers are perfect when sliced in rounds and can be used as a healthy substitute for crackers. 

Dip – This could be a favorite from the deli or a special recipe made in advance.  If you have a few minutes, I do highly recommend making your own.  One of my favorite dip recipes is SarahFragoso’s Roasted Red Pepper Dip (click on the link then scroll down for the recipe).  I’ve also included my easy honey mustard dip recipe at the bottom of this post. 

Olives – Pitted green olives are usually a safe bet. 

Fruit – Choose something easy to prepare and simple for guests to grab and eat.  Grapes are a wonderful choice year round; berries are always appreciated in the warmer months.

Nuts – Pecans and walnuts seem to be the most popular at parties.  If you have time, try spicing things up by serving my Maple Cinnamon Pecans.  Simply make them a day in advance, keep in a Ziploc bag, and serve in a cute bowl!


Honey Mustard Dip
·         ¼ cup mayonnaise
·         1 ½ tablespoons mustard
·         2 tablespoons honey
·         ½ teaspoon garlic powder
·         ¼ teaspoon cayenne
·         ½ tablespoon olive oil
·         ½ teaspoon lemon juice
·         Pepper, to taste

Mix all ingredients together in a small bowl.  Serve with sliced veggies.

Monday, December 3, 2012

Maple Cinnamon Pecans

Ah, the holidays, what joy they bring!   I know everyone doesn’t feel the same way and I do agree that sometimes the commercialism of it all can turn anyone into a Scrooge; however, many of the Christmas traditions I grew up with will always hold a special place in my heart.  Of course, one of those traditions is the preparation of traditional holiday foods, particularly sweets. After adjusting my diet to eliminate most processed foods and refined flour and sugar, I’ve found I have a different appreciation for sweets.  No longer do I crave the taste of corn syrup and white sugar, but instead I’ve developed a taste for rich and creamy textures, the delicate flavor of honey, and fine quality chocolate.  This delightful balance of flavors is what prompted me to create the Cashew Butter Cup recipe that I posted last week.  Today I’d like to share another favorite with you all.  This particular recipe is one I make often around the holiday season, and also frequently at other times during the year.  Instead of focusing on a rich and creamy texture, with this recipe I wanted to bring in the candied crunch that many of us enjoy, whether as a snack, on a salad, or atop a bowl of ice cream.  This week I’m happy to share my simple yet satisfying recipe for Maple Cinnamon Pecans.  Enjoy without the added guilt of corn syrup and sugar!
Maple Cinnamon Pecans 
·         2 cups raw pecans
·         ¼ cup maple syrup
·         1/2 teaspoon cinnamon
·         1 pinch sea salt


1.      Soak and dehydrate pecans.  I always try to purchase raw nuts, then soak and dehydrate them to ensure proper nutrient absorption.  (Of course, this week they were all out of raw pecans at the grocery store!  But, for the sake of this recipe, let’s pretend they are raw.) Soak in a bowl of water with one teaspoon of salt for 6-8 hours.  Then, dry in oven at lowest heat (or dehydrate) until dry.  Nuts naturally contain enzyme inhibitors that will hamper digestion and sometimes even prevent the body from absorbing nutrients.  Read here to learn more about proper preparation of nuts.

  2.      Spread pecans on a baking sheet and roast at 300 for 15-20 minutes, or until crunchy.

3.      While pecans are roasting, combine syrup, cinnamon, and salt in a medium saucepan and cook on low for 5 minutes, or until very runny.  Remove from heat.


4.      Mix roasted pecans with syrup and stir until pecans are coated. 


 5. Spread pecans evenly on parchment paper to cool. Serve when coating has hardened, after about 2 hours. Enjoy!


Sunday, November 18, 2012

Cashew Butter Cups - Recipe!


I had been searching (unsuccessfully, I might add) for quite some time for a Peanut Butter Cup recipe…except without sugar…and no peanut butter…and also gluten-free J.  Can you understand my dilemma?!  Finally, last week I took it upon myself to craft my own recipe, and not to toot my own horn, but it turned out pretty darn good!  Using a nut butter recipe I make often (modified from the Nourishing Traditions cookbook), I was able to create this delicious, creamy chocolate dessert.  Enjoy my Cashew Butter Cup recipe alone or topped with ice cream and a piece of fruit for some extra pizzazz.


Cashew Butter Cups
Makes 18 servings

Chocolate Base
¾ cup cacao butter, melted
1/3 cup cacao powder
¼ cup, plus 1 tablespoon honey
¼ teaspoon vanilla
2 pinches sea salt

Combine all ingredients until smooth.

Cashew Butter
2 cups raw cashews, soaked and dehydrated
1 big pinch sea salt
3 tablespoons honey
½ cup coconut oil

Combine cashews and sea salt in the food processor and process on low until a fine powder forms.  Add honey and coconut oil to cashews and process until creamy.

To assemble Cashew Butter Cups:

Using a regular sized muffin tin, fill each space about ¼ full with the chocolate base.  Place tin in freezer for 20 minutes or until chocolate is solid.  Remove from freezer and top with an equal amount of cashew butter (each space should be about ½ full at this point).  Place in freezer for 15 minutes.  Remove from freezer and let sit for 5 minutes; this will help loosen the chocolate.  Serve alone or topped with ice cream and berries.  Bon appétit!

Sunday, June 24, 2012

Stuffed Trout - yum yum!

How is everyone enjoying their summer?  We’re having some exceptionally warm days here in Colorado.  Needless to say, Dave and I have been hanging out a lot indoors, working on various projects.  Living in a small space, we’re constantly keeping an eye out for new ways to add storage and keep everything organized.  Dave is in the process of making several custom shelves for our laundry area, front closet, and bathroom.  My current organizational project is a condensed recipe book containing only recipes we use and love.  And, when I finally get around to my sewing project, we’ll have a couple of gorgeous throw pillows and a new curtain to “jazz” up our place.   
After our trip to Table Rock Lake in Missouri with my family this past May, Dave and I realized that we both have a real interest in fishing.  So, without wasting any time, we went to Bass Pro, bought a couple of poles and started fishing!  While we haven’t yet caught anything big enough to keep, we’re having a fun time enjoying nature together. 
Fishing is also an incredibly practical hobby.  I mean, what better way to cut back on the grocery bill than to actually hunt/gather/catch the food yourself?!  We are a very “fish-friendly” household, and buying fresh, good quality fish every week can get expensive!  I know many of you don’t care for the flavor and/or texture of fish or struggle with how to prepare it, so I hope the recipe below will help. 
After being “gifted” a batch of trout from one of Dave’s co-workers, we’ve been able to perfect our stuffed trout recipe.  Hopefully I will get to use this recipe on my very own catch once we get back from our upcoming fishing/camping excursion this week!
Stuffed Trout:
·         4 trout, cleaned, skin on and heads removed
·         Olive oil (for sautéing vegetables)
·         1 garlic clove, minced
·         1 green pepper, thinly sliced
·         2 green onions, thinly sliced
·         6 mushrooms, chopped
·         4 tbsp. melted butter
·         2 tsp. dried dill
·         2 tsp. dried parsley
·         1 tbsp. fresh lemon juice
·         4 lemon wedges
·         Salt and pepper to taste
·         Freshly grated Parmesan cheese, optional
Preheat oven to 400 degrees F.  Sauté garlic, green pepper, onions, and mushrooms in a bit of olive oil.  Once softened, remove from heat.  Season skin of trout with sea salt (both sides).  Pour 1 tablespoon of melted butter over the flesh side of each fish.  Season flesh of fish with dill, parsley, salt, pepper, and lemon juice.  Place a lemon wedge on top of each fish.  Wrap fish individually in foil and bake for 15-20 minutes, checking after 15 minutes (fish should flake off the bone).  If desired, sprinkle Parmesan cheese over fillets beore serving.  Enjoy!

Wednesday, May 23, 2012

Two Healthy Picnic Recipes

Hi Folks!  Dave and I took two week-long trips in the past month, all while frantically trying to keep up at work and maintain our sanity.  We got back into Denver on Saturday evening, and somehow mustered the energy to plant our balcony container garden on Sunday.  (Denverites: if you have not been to Paulino Gardens -north on I-25, exit 58th ave - you MUST go!  It’s a fantastic nursery and even if you don’t buy anything it’s fun to look around at all the plants.  We try to make a trip up there every few months or so and always end up buying something.  I swear, with all of the plants in our little 950 square foot home, we must have a mini-ecosystem or something!)  I’m really excited and optimistic about our garden this year.  Last year was our first year experimenting with container gardening, and it was certainly a learning experience.  We’ve decided to scale it down for 2012 but still have plenty of flowers and herbs, as well as a cherry tomato plant, two small variety pepper plants, and a Lisbon lemon tree.  Cross your fingers for us!
As we all know, Memorial Day weekend traditionally rings in the summer, usually with lots of outdoor parties and FOOD.  In the past I have had a hard time at barbeques because there is often a lack of vegetable dishes and an abundance of junk food.   Luckily, I now have a few tried and true alternatives to the junk.  In the spirit of the upcoming holiday, I’m going to share a couple of my favorites with you.  I hope these recipes give you some fresh ideas!  Enjoy the weekend!
Refreshing Herbal Tea
For those of you who are looking for a lightly sweetened, non-alcoholic, caffeine free, and sugar free beverage, I highly suggest Stash Herbal Tea’s Wild Raspberry Hibiscus Tea.  Add a little stevia powder while the tea is brewing and serve over ice with a fresh lemon wedge.  Hibiscus can also help lower blood pressure! 

Asian Slaw
Recently, I actually took the time to read a few articles in my Vitamin Cottage grocery store flyer and came across this delicious slaw recipe!  I’d been trying to find a tasty non-mayonnaise based slaw for a while and this one is definitely a winner.  Keeps well, especially at picnics or barbeques where food sits out in the heat.
6 cups thinly sliced napa cabbage (red, green, or a combination can be substituted)
2 large carrots, grated
6 green onions, thinly sliced
½ cup chopped cashews

Dressing
1 tablespoon sesame oil
2 tablespoons olive oil
2 tablespoons rice vinegar (or apple cider vinegar)
1 tablespoon soy or tamari sauce
1 clove garlic, minced
1-2 tablespoons honey
Red pepper flakes to taste

Combine the prepared vegetables in a large serving bowl. In a separate bowl whisk the dressing ingredients thoroughly. Pour dressing over the vegetables and toss to combine. Top with chopped cashews and serve.

Quinoa Salad
The idea for this recipe comes from our trip to northern CA last year.  My brother-in-law introduced Dave and I to quinoa through a delicious salad.  I’ve since adopted a variation of the salad as a staple in my meal rotation.

8 cups fresh spinach
2 cups quinoa, rinsed and cooked
4 links chicken sausage, cooked and sliced (I recommend a chicken/feta/spinach blend sausage)
6 hard boiled eggs, sliced
3 carrots, peeled and grated
1 beet, grated*
1 pint cherry tomatoes
½ cup dried cranberries
½ cup feta cheese crumbles
½ cup walnuts, roughly chopped
Pepper, to taste
Fresh lemon juice, to taste

Assemble the salad and season with pepper and lemon juice.  Serve with a lemon/tahini dressing or balsamic vinaigrette.

*Sometimes grated beets can turn the quinoa a shade of pink.  Omit for a nicer presentation, or keep if you like pink quinoa J

Monday, February 6, 2012

A Little Catch Up and Some Curry Recipes

WOW – don’t the holidays just make life crazy for a while?! I’ve thoroughly missed being able to take time to research food and nutrition and share my journey with you all. Along with some delicious recipe suggestions, I want to mention where I’m at with my diet and health.

As I’ve been working more it’s become much more important to take the time out to plan weekly menus and have the appropriate ingredients on hand for well-rounded meals. Some weeks are better than others, but Dave and I have really started to master the concept of one-pot meals. We’re also working on the semi-daunting task of organizing all of our favorite recipes into our personal recipe “Encyclopedia. “

While my routine has changed a bit over the past several months, I’ve learned that it’s really never acceptable to be too busy to take care of myself. I’ve found that it’s ok to say “no” to an activity if I know I need some personal relaxation time. It’s also become increasingly important for me to make sure I allow myself adequate time to prepare meals in the evening. Not only is the act of cooking therapeutic (for me), but eating a nutritionally sound meal is also incredibly vital to my well being.

My workout routine has changed too, but I still make sure I have some time everyday to get some exercise. Usually that comes in the form of walking Ozzie, but that’s ok! I’ve found that a 30 minute walk on most days, combined with some light weights and yoga at home once or twice a week is adequate. As I’ve mentioned before, I think so many people overdo it with strenuous exercise, thus exacerbating inflammation and joint stress. It’s important to look at the big picture.

Some people ask if I’m “still on the diet.” I suppose the answer is yes, but I have to say I don’t consider the way I eat to be a “diet” in the modern sense of the word. This is the way I was designed to eat; I eat the food that best fuels my body. The more time I spend eating a Paleo diet and researching (and experiencing) its benefits, the more positive changes I notice in myself. I’m continually trying to find the best combination of foods to optimize my health. Now that I have my blood sugar under control, I’ve become open to eating more carb-rich foods on a regular basis. Of course, I still make sure I’m eating whole sources of food, grown organically and prepared properly (soaking and sprouting, for grains). Most notably, I’ve started to include quinoa, wild rice, and sweet potatoes in our weekly menu. These additions are more in line with the Weston A. Price “diet,” but I’ve always said Paleo eating is a hybrid approach for lots of people.

There are always things I wish I could do better, but doing the best that I can given the circumstances is admirable, at least I think so :) In the spirit of continual growth and development, here are my three health goals for 2012:

1) Eat more salmon and cold water fatty fish.
2) Spend less time at the computer and more time in the sun.
3) Learn how to make and can fermented foods.

And now for a few recipe ideas!

Curry is a spice I’ve recently added to my repertoire. Dave and I both have an affinity for flavorful, spicy foods, so curry is just the thing to spice up many of our dishes! Not only is curry delicious, but it’s also a powerful anti-inflammatory. Many of the curry recipes we enjoy are from Sarah Fragoso’s book, Everyday Paleo. If you haven’t checked out her website, you should - she has some awesome recipes and workout suggestions!

Here are our favorite curry recipes, which always have a place on our regular menu rotation:

1) Baked Cauliflower

Delicious and easy! We usually use coconut oil as opposed to olive oil due to the high heat, but either way is great.

2) Butternut Squash Soup
Traditional butternut squash soup is a little bland for me. This one takes it up a notch. With only four ingredients and very little prep time, you have to give it a try!

3) Butter Chicken

Time after time Dave has told me that this is by far his favorite dish. But, the one thing this recipe is missing is the curry! I add quite a bit, usually about a tablespoon or more, and sometimes even a pinch of cayenne to really spice it up! If you have it on hand, adding some masala and turmeric will really increase the flavor profile. I’ve found with this dish, the more spices the merrier! I also tend to substitute cream for the coconut milk, makes it a little more rich and creamy. Dave and I like this best serve over lacinato kale, but any green will do the trick.

4) Sweet Potato Hash
My version of sweet potato hash is a mix between the recipe above and another Sarah Fragoso recipe. Basically, I brown a pound of ground meat (usually spicy pork sausage), add as many veggies as I want (usually a couple bell peppers, a zucchini, and some mushrooms), two sweet potatoes, a couple tablespoons of coconut oil, ½ tbsp cinnamon and 1 tbsp curry. If we’re really hungry, I’ll throw a couple of fried eggs on top. Makes a great breakfast, lunch, dinner, or snack!

Tuesday, November 1, 2011

The Importance of Homemade Stock

I’m back! Life has gotten a little busier for me lately, so my blogs may be fewer and farther between for a while. Hopefully everyone interested has subscribed to my blog email updates.
I mentioned a few posts ago that I hoped to soon write about homemade stock - so here it is! I’m going to focus on soup-making, but keep in mind that homemade stocks can be added to a variety of other dishes and almost any sauce.

Could there be a more perfect time to discuss the deliciousness of homemade soup? I adore autumn and all that comes with it. Growing up in Missouri, I experienced very pronounced seasons and my favorite, by far, was fall. A large part of my “autumn enjoyment” comes from the memories I associate with this time of year, including all of those warm, aromatic comfort foods that I will always associate with “home.”

It was only a couple of years ago that I assumed the stock-making process was way too long and involved for my busy life. I remember reading instructions in a gourmet cookbook and thinking “forget it; I’ll just keep buying Swanson’s!” Finally, I tried my hand at making chicken stock and realized that it’s actually very simple and easily altered to suit taste, time constraints, and ingredients on hand. I truly wish more people would embrace homemade stock-making, as it seems to have become a lost art in our busy world today.

Along with being beyond yummy, homemade stock is incredibly nutrient dense. If made with quality bones from healthy animals, stock can truly be a healing food. In many cultures, throughout history homemade soup was often the first treatment for those feeling ill. Modern research has actually confirmed the truth behind this ancient wisdom, as components of the cartilage used in stocks have been used successfully in the treatment of various ailments. Unfortunately, most people reach for that can of Campbell’s instead of taking the time to create soups from homemade stock.

Another interesting property of homemade stock is its ability to aid with digestion. Traditionally, many cultures begin their meals with a bowl of soup. Perhaps we have simply become accustomed to soup as a starter food, but there is actually a reason behind this practice. Cooked foods are generally more difficult to digest than raw foods; however, homemade stock is the exception to the rule. Stock contains gelatin which makes digestion much easier. If you frequently have trouble with digestion, it may be a good idea to look into adding homemade stock into your daily diet.

I make three different stocks at my house: fish, chicken, and beef. I make chicken stock with the most frequency since I find it’s more universal in recipes. I purchase whole chickens from the farmers market each month and usually roast the chicken first and then and use the bones to make stock. I also like to slow cook the whole chicken (meat AND bones) in a pot of water, veggies, and spices to create a more rich and flavorful broth. Beef “soup bones” are pretty easy to find at the farmer’s market and very reasonably priced. Fish stock is a little more difficult to make since I live in a landlocked state with limited access to fresh, good quality fish. If I can get my hands on some non-oily fish, I’ll use that to make fish stock. Otherwise, bonito flakes boiled with water and vinegar makes a lovely broth.

Here is my basic stock-making process:

1) Place bones into a crock pot (I usually fill it about 2/3 full).
2) Slice a carrot, celery stalk, and onion and add to crock pot.
3) Add a couple of whole garlic cloves, fresh or dried herbs, salt and pepper.
4) Add a tablespoon or two of vinegar (this step is important – the acidity in the vinegar helps draw minerals into the stock).
5) Fill crock pot with water, almost to the top.
6) Simmer on low to medium heat for anywhere from four hours up to a couple of days.
7) After straining, pour stock into jars and refrigerate for several hours.
8) If there is a layer of fat on top of the liquid in your jars, remove it before freezing.

Making homemade stock shouldn’t be stressful and you shouldn’t feel restricted by a recipe. Remember that the longer you cook the stock, the more flavorful it will be. Availability of spices or vegetables shouldn’t affect your ability to make stock. Use what you have on hand and season to your liking. Also, keep in mind that commercially raised chickens often won’t produce gelatinous stock – another reason why it’s very important to purchase quality poultry and meat products. There are many different kinds of bones that can be used in stocks, so don’t limit yourself. If you find something interesting at a farmer’s market, go for it. Chicken feet make an incredibly gelatinous stock, as gross as that may sound! One of the lessons we can learn from making stock is the idea that every part of an animal should be used and nothing wasted – another concept seemingly lost in society today.

Once you have made the stock, it will keep for months in the freezer. When you are ready to make soup, use your imagination! My favorite soup to make is a simple chicken and vegetable soup, but the options are limitless. Try some experimenting and come up with your own version of something that’s been around a while. Or, pull out that recipe for your favorite tried and true soup recipe - one that reminds you of “home.” I’ll never forget my Grandmother’s delicious homemade noodle soup. Made with homemade stock and noodles from scratch, this recipe is simple but will always hold a place in my heart (and recipe box). To this day, if you placed a bowl in front of me, I’d eat it every last bite, gluten and all :).

Friday, September 2, 2011

Smoked Salmon Recipe

As you can see with the lack of posting, I’ve been a bit of a slacker in the food department lately. Life gets so busy at times and I think we often put our food and nutrition needs on the back burner. As I’m digging myself out of this rut, I realize that I actually haven't been quite as unproductive as I originally thought...

Usually I browse through my favorite grocery store’s sales flyers on Friday, and then spend some more time looking through my cookbooks and online for the perfect recipes. I then put together a menu and grocery list for the following week. Lately I’ve just been winging it; I purchase my food staples and then grab whatever else is on sale or looks fresh. I’m a super organized person, so cooking like this for the past month or so has been driving me crazy! But as disorganized as it seems, I just came to the realization that it’s been a great learning experience for me.

Instead of feeling restricted by a menu and specific recipes, I’ve been creating meals on the fly with whatever I have on hand. Some have been delicious and others not so good, but I always get a sense of satisfaction out of my creations. I’d like to share one of my favorites with you.

Smoked salmon, veggies, and spicy cream cheese

I LOVE sushi but don’t get the opportunity to eat it all that often. The rolls are my favorite and I’ve always been a fan of the Philadelphia Roll made with smoked salmon and cream cheese. White rice is gluten free and one of the exceptions I’ll make in the grain category from time to time, but when I’m trying to emulate the flavors at home it’s certainly ideal to skip the rice. So this is what I came up with:

1 package smoked salmon
2 eggs, poached
1 avacado, sliced
½ cucumber, sliced
2 roma tomatoes, sliced
3 tbsp cream cheese
Wasabi, to taste
Salt and pepper, to taste

After slicing the tomato and cucumber, season with salt and pepper. Place the avocado slices in a small bowl, and season with a few drops of lemon juice, salt and pepper. Place the smoked salmon pieces on a large plate. Mix the cream cheese with the wasabi and spread evenly on the smoked salmon. Layer the avocado, cucumber and tomato slices on top of the salmon, covering the entire area. Top with the poached eggs, salt, and pepper.

I wish I had a picture to share because this dish has a fabulous presentation! Enjoy for breakfast, lunch or dinner!

Friday, August 19, 2011

Raw Food: Musings and a Recipe

A couple of months ago I was at the library in the cooking section. I had gotten a little tired of all the usual recipes I prepare and wanted to try something new. Usually I just skip right over the vegan/vegetarian section unless I am specifically trying to find a new veggie recipe. However, this time, kind of on a whim, I grabbed a raw foods cookbook and curiously glanced through the recipes. The food looked delicious and interesting so I added the book to my pile.

Of course I’m not interested in adopting a vegan diet and most certainly not a raw foods diet, but I as I mentioned in my last post, I think it’s vital to keep an open mind. For those unfamiliar with a raw foods diet, it basically encourages consumption of foods in their “living” state, so heating anything over 118 degrees Fahrenheit is a no-no. It’s like the vegan diet on steroids. I like the basis of the raw foods diet: using fresh whole ingredients, buying produce locally and seasonally, and refraining from consumption of processed foods. But, there are some claims by raw foodists which I think can be somewhat misleading to those unfamiliar with nutrition.

In the cookbook I borrowed from the library, the authors mentioned that people following a raw foods or vegan diet can obtain their full requirement of omega-3 fatty acids from foods like flax seed and walnuts. Unfortunately, these foods only possess the plant-based form of omega-3 and therefore do not contain valuable DHA and EPA which are only found in animal sources like cold water fatty fish (and algae). The body is able to convert some of the ALA found in plants-based sources of omega-3 into DHA, but it does so only in very small amounts.

The authors also claimed that raw foodists would be able to fufill all of their vitamin A requirements with plant-based sources as well. However, true vitamin A only comes from animals and is especially dense in liver. Some vegetables contain carotenoids (like betacarotene in carrots) which the body converts to retinol (the functional form of vitamin A). The problem with obtaining all of the required vitamin A from vegetables is that the body needs about three to four units of carotenoids to make one unit of retinol. This means you’ll have to eat an absurdly impossible amount of veggies just to meet daily vitamin A requirements. The conversion mentioned above is just an average; some people are able to create more retinol, some less, but never a one to one ratio.

I found several more statements of concern throughout the book and was glad that I had the knowledge to recognize these fallacies…otherwise I might be a raw foodist myself! This is exactly why it’s so important to do your own research and figure out what’s really best for your body. No one book or documentary or blog or author or doctor can ever give you the answers you really need to live a healthy life. It’s an ongoing journey in which we all need to be proactive.

Ok, now that I have that tidbit aside, back to the raw food recipes! I actually found most of the recipes to be quite intriguing. Dave and I bought a dehydrator recently otherwise I wouldn’t have been able to make very many of the recipes. None of the raw foods I made came out perfectly, but I will definitely do some more experimenting. If you do have a dehydrator, I would highly recommend making a grain-free, vegetable-based wrap…and here’s how:

2 zucchini
1 ½ cups ground flaxseed
2 cups water
1 tbsp. psyllium powder
1 garlic clove
Pinch of salt
4 tbsp fresh herbs OR 2 tbsp dried herbs*

*For the herbs, use whatever fresh you have on hand or your favorite combination of dried herbs. Oregano works really well with this recipe.

Combine all ingredients in a food processor. Dehydrate at 110 degrees for 5-6 hours.

The first time I made these I wasn’t sure if I had dried them too long or not enough! When spreading the mixture in the dehydrator, try to spread it as evenly as possible - this will help when you are trying to determine whether or not the wraps are done. Psyllium husk is supposed to add flexibility to the wraps, which is why I’ve included it in this version. I’ve also read that soaked chia seeds may help with making the wraps more “wrap-like.” Be sure to flip the wraps halfway through and keep an eye on them to make sure they don’t get too crispy. But if they do get crunchy, then you have some yummy zucchini crackers! The original recipe I made from the book was a little "blah" so I added some spices to make it more palatable.

Experiment with this. It’s definitely not the same as a warm, soft flour tortilla, but it’s a healthy and fun alternative!

Friday, July 1, 2011

Taco Night!

I love being in the kitchen. Obviously. If I have the time, I truly enjoy spending a couple of hours cooking up an elaborate meal. But life happens and often I don’t have that kind of time to prepare our food. On those days I greatly appreciate my favorite quick and easy go-to recipe. I’m sure most people have some version of “taco night”, and at Casa De Huling, ours happens to be a “taco-less taco night.”

When I was a kid I loved taco night. It was awesome. All that yummy seasoned meat, cheese, and veggies was so fun to assemble on my plate. My mom always set it up like a taco bar, so we could pick and choose what we wanted to have on our plates. Dave and I do our taco night the exact same way, but with a few menu variations.

At first we felt more than a little lost without that humongous, white tortilla to wrap everything up in. I think Dave actually got a little teary-eyed when I told him I would no longer be cooking with tortillas. But after some contemplation, we’ve discovered some equally delicious and far more nutritious alternatives to the tortilla or taco shell. Try any of these ideas as your “taco base”:

Romaine or Iceburg Lettuce
Red or Green Shredded Cabbage
Soaked, Sprouted, and Cooked Quinoa

You can’t rightly have taco night without any meat now, can you? One of the fun things about this meal is that you truly can improvise and it will still taste delicious. I get the best results using lean ground beef, but you can also use ground turkey, ground bison, or ground chicken. If you’re a fan of heat, kick it up a notch and use equal parts of spicy ground pork sausage and ground beef. I have a never fail homemade taco seasoning that I usually make ahead of time and keep in my spice cabinet. Having the seasoning pre-made is definitely a time saver. Here’s my basic taco seasoning recipe:

1 tbsp chili powder
¼ tsp onion powder
¼ tsp garlic powder
¼ tsp red pepper flakes
¼ tsp oregano
½ tsp paprika
1 ½ tsp cumin
1 tsp sea salt
1 tsp black pepper

Brown 1 lb. ground meat and drain off fat, if necessary. Mix 2 tbsp. of the seasoning mix with 1 ½ cups of water and pour over the ground meat. Simmer, covered, for 10-15 minutes. If the seasoning mix is too spicy, omit the red pepper flakes. If you have any leftover, the seasoned ground meat makes a delicious breakfast the next morning. Poach or fry a couple of eggs and serve on top of the ground meat.

I like to include as many veggies as possible in my meals, and taco night is no exception. Of course for the tastiest tacos, homemade guacamole or sliced avocado is mandatory, along with some diced tomatoes and chopped fresh cilantro. Time permitting, I also like to do a fajita type thing and sauté a couple bell peppers, an onion, and a few garlic cloves together and then add to the seasoned meat.

For those of you still eating dairy, adding a bit of cheese or sour cream to the top of your taco is really like putting the icing on the cake (bad analogy for a paleo blog, I know!). Since we don’t usually have sour cream at our house, sometimes I’ll use full fat plain yogurt which adds the texture I like but is lacking a bit in richness. As for the cheese, I know a lot of people like it until it’s bubbling, but I will mention that cheese is much easier to digest when not melted. However, I don’t think a little melted cheese every now and then ever killed anyone :).

So that’s my taco night. You can get as crazy you want with the add-ons or just keep it simple by browning some ground meat with seasoning and throwing it over a few fresh lettuce leaves. Voila. You’ve got your fat, protein, and veggies. Maybe not the most nutrient dense meal you've ever had, but it's easy, it satisfies, and it makes some delicious leftovers for breakfast the next morning!

Monday, June 20, 2011

Who Wants Dessert?

For the past six months I’ve attempted to overcome this massive sweet tooth that I’ve had for as long as I can remember. When I was young, not unlike most kids, I would milk my parents for as many sweets as I could get. In my teenage years I fed my cravings with Mountain Dew, skittles, ice cream, and plenty of other junk that is oh so irresistible at that age. Through college and most of the years following, I toned it down a bit with the idea that anything in moderation was “ok.” I concentrated largely on cutting out fat, meat, and general caloric consumption but didn’t realize that sugar was by far the most damaging food I was eating. I lived off of 100 calorie snack packs, granola bars, breakfast cereals, and other sugar filled processed foods. Several times a month I would indulge in one of those huge ice cream sundaes topped with candy and fudge. After a while I started to notice the negative effect these foods had on my body. It wasn’t until I began pouring myself into nutrition research that I realized exactly how much sugar I was consuming on a regular basis and just how bad it was for my body.

Sugar, Insulin, and the Body

It’s important to understand how sugar affects the human body. It’s especially important if you are someone with PCOS (like me) or if you have another disease that is strongly affected by insulin response and blood sugar surges. At the heart and soul of PCOS, metabolic syndrome, and diabetes is insulin resistance. Many medical practitioners refer to insulin resistance as “pre-diabetes.” Personally, I don’t care for that title as I think many patients misinterpret this title as a diagnosis of diabetes itself. This is not the case and it’s vital to understand that insulin resistance can be managed and even reversed. To put it simply, insulin’s job is to carry glucose (sugar) to the cells where it is used for energy. Each time a person eats a sugar-containing food, insulin levels surge to remove the glucose from the blood to store it for future use. As this cycle is repeated more and more frequently, insulin receptors slow in their response time. This leads to increased glucose in the bloodstream and causes energy levels to decrease since the insulin receptors are no longer responding to convert glucose into energy. A person in this scenario will become fatigued (along with a host of other symptoms) and actually crave more food, usually in the form of sugar. Eating food will give the person a brief feeling of relief until the cycle repeats itself again. Eventually this can lead to type 2 diabetes, a permanent condition in which the body can no longer manufacture insulin. Insulin resistance is often a condition which a person encourages within their own body, making it both preventable and manageable for many people.

Since learning about the importance of cutting back on the sugar in my diet, I’m much more aware of foods that contain sugar, what types of sugar they contain, and how they will affect my body. I find it quite easy to consume very little sugar on a daily basis since I cook most of my meals using a whole foods approach. But I certainly haven’t cut out all sugar; that would be pretty darn hard and not much fun for my palate! For years I’ve had the terrible habit of consistently following dinner with something sweet even if I am not hungry. It’s been hard for me to break this habit completely since I think it’s somewhat of a “Pavlov’s dog” response with me. Eat dinner = get dessert! And I doubt I’m the only one out there struggling with this issue.

I don’t think it’s terrible to have a sweet treat every once in a while. Heck, I still have one several times a week, but nothing like the monster ice cream sundaes I used to eat. I’ve discovered a few satisfying alternatives to the huge desserts many of us have become accustomed to. Enjoy!

Coconut milk ice cream

I like the Coconut Bliss and Purely Decadent brands. These brands have very few ingredients, especially in the vanilla and chocolate flavors, and are sweetened using agave syrup (definitely not the best sweetener, but not the worst either). They are also soy-free and dairy-free, making them a good option for those who may otherwise be unable to eat ice cream. Vanilla and chocolate flavors are also lower in sugar content than the other flavors. I have yet to find an ice cream actually made from cream that has as little sugar as coconut milk ice cream. The down side to the coconut milk ice cream is that it’s very expensive. One pint costs between $4 and $5 dollars. I’ve found Purely Decadent frequently goes on sale, so I purchase it more often than the Coconut Bliss. Even on sale it’s pretty costly, so, Dave and I don’t eat a lot and only buy about a pint every week or two. For dessert, I’ll eat a few spoonfuls and sometimes add a little nut butter or berries on top to make it an extra tasty treat. Better yet, if you have an ice cream maker, try making your own ice cream.

Custards and Claufoutis

These desserts can be made easily with few ingredients and don’t need much sweetener. Just the other night I made a strawberry claufouti based on a recipe from the Primal Blueprint Cookbook. The ingredients I used for my claufouti filled two pie plates and only needed about three tablespoons of maple syrup as a sweetener. Be cautious though, as most traditional recipes call for white sugar, so try making your own recipe using maple syrup or honey, or do a quick internet search for low-sugar custard recipes.

Plain, full fat yogurt with fruit, honey, nuts, and cinnamon

I’ve mentioned this combination in previous posts and it just never gets old! Yogurt makes a great snack and adding a few items can really ramp it up to dessert level. I’ve gotten to the point where I don’t even need honey in my yogurt anymore; the fruit alone is enough sugar for me. Just make sure you’re getting a good quality plain yogurt, preferably full fat with no added sweeteners.

Dark chocolate

Need I say more? I like the Endangered Species Extreme Dark Chocolate (88% cocoa). Typically, higher cocoa content means less sugar. And, dark chocolate is usually more filling than milk chocolate varieties. The down side to this brand is that it does have some soy in it and it’s on the pricey side ($2.50 for a 3 oz. bar), but I don’t find myself eating more than half a bar a week, so it does the trick for me.

Cheesecake

This is something I have yet to experiment with on a paleo/primal level. I have made a gluten- free cheesecake using almond meal for the crust instead of graham crackers and it was delicious. There are plenty of sugar-free and low-sugar cheesecake recipes online and combining that with a gluten-free crust would be delicious. I’ll save that for a future post!

Nut Butter

I highly recommend making your own nut butter since most brands do not soak and dehydrate nuts to deactivate enzyme inhibitors. Doing so will increase the nutrient content of the nuts and also ease digestion. It’s easy to make nut butter – simply grind the nuts in a food processor. Sally Fallon has an excellent recipe for sweeter nut butter in her Nourishing Traditions cookbook.

Smoothies

I posted a basic smoothie recipe last week and suggested it as a post-workout snack. Smoothies are great for snacks or breakfast, but they can also make an awesome dessert! Start with the basic recipe: 1 cup coconut milk, 1/4 cup plain yogurt, 1/2 tsp cinnamon, and 1 tbsp nut butter. After that, add whatever fruit you like and if you need to sweeten it up a little bit, add a touch of honey.

Plain ol’ fruit

This is about as primal as you can get!